How to Sew a car subwoofer wiring kit
Today we discuss How to Sew a car subwoofer wiring kit. If you’re looking to buy a new subwoofer, but don’t know where to start, we’ve got the perfect guide for you. This post is about how to sew a subwoofer wiring kit. So whether you’re just getting started or you’ve been wanting to upgrade your current setup, we have the perfect guide for you.
Understand the basics of subwoofer wiring:
Before you get started, it’s a good idea to learn the basics of subwoofer wiring first.
The most common setup for a subwoofer is to hook it up to a receiver or amplifier. This means you will need to know how to route your speaker wire from the amp, down into the box, and out through one of the speakers in your enclosure.
There are two types of connectors for speaker wire: spade connectors and banana plugs. Banana plugs have four prongs and are typically easier to use with newer receivers that don’t have spade connectors built-in. Spade connectors are found on older receivers and can be used with either banana plugs or bare wire connections.
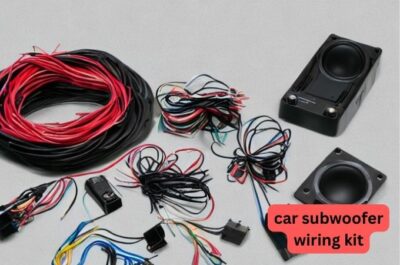
Sew a subwoofer wiring kit:
You can find all the parts and materials you need to sew a subwoofer wiring kit at your local hardware store or home improvement warehouse. You will need a length of wire, a few pieces of insulated copper wire, and one white speaker wire.
To make a subwoofer wiring kit, start with the copper wires. Take your copper wire and thread it through the small holes in the speaker cones until it comes out on the other side, then tie off the end.
Now take your white wire, thread it through one of the large holes in each cone, then thread it back into its own small hole on the top of each cone’s metal surround, where it’ll remain for now.
Next, take one piece of insulated copper wire and thread it into one of the smaller holes on each cone’s metal surround so that it lines up with its corresponding hole on the bottom side of each cone.
Then take your second piece of insulated copper wire and thread it into the next smaller hole on each cone’s metal surround so that its tip is flush with its corresponding hole on top. Now take your third piece of insulated copper wire and thread it into yet another smaller hole on both cones’ metal surrounds so that its tip is flush with their corresponding
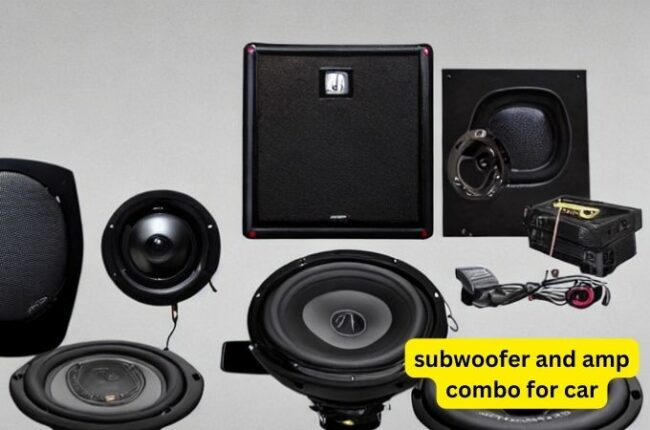
Connect your subwoofer to your audio system:
Your audio system is one of your most important investments. You want it to sound good, and you want to make sure it’s protected from damage.
First, let’s talk about how to connect your subwoofer. There are a few different ways you can do this:
– Connecting with a Subwoofer Y-cable
– Connecting with Speaker Wire
– Connecting with RCA cables
Which route will work best for you depends on the type of connections in your audio system and what kind of quality you’re looking for in your sound. If you’re not sure which option is best for your setup, we recommend using the speaker wire connection method. This offers the best signal quality and flexibility in terms of where the cables can go.
So now that you know how to connect your subwoofer, let’s get started sewing some wiring kits! This step-by-step tutorial will walk you through every step of creating a 4-channel wiring kit that includes two voice coils and two heatsinks. It should take about 20 minutes from start to finish.
Troubleshooting your subwoofer:
Answering the question “How do I sew a subwoofer wiring kit?” is easy. First, you need to solder your wires together. And, for this, you will need a soldering iron with a temperature-controlled tip and rosin-core solder.
Sewing wire is relatively simple if you follow these steps:
1. Cut your red wire in half.
2. Strip off about an inch of insulation from the end of each of the two pieces of wire.
3. Insert one end of one wire through one hole in your box and then thread it back through the other hole on the opposite side of your box as shown below, leaving about 1/2 inch exposed at either end:
4. Repeat step three with the second piece of wire, only this time threading it through the far-right hole on the same side as before (as shown below):
5. Once you have both ends threaded inside, use a twisting motion to tighten up the ends around what was left outside:
6. Now that they’re tight, put some solder onto your iron’s rosin-core solder and drag it along each exposed end:
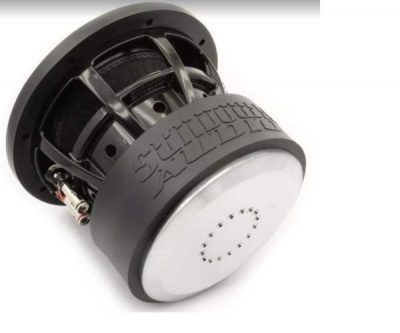
The best way to use your subwoofer is through a wiring kit:
You can find a lot of different subwoofer wires online. But, if you’re just getting started and don’t have any experience with wiring kits, it might be hard to know which one is best for your needs.
The best way to use a subwoofer is through a wiring kit. Wires are the most complicated part of this type of equipment and require the most skill. A great wiring kit will come with everything you need to start putting together your subwoofer into different configurations. So if you’re looking for a good wire, make sure your purchase includes everything you need to get started.
There are many different types of wire available as well, including flat-wound or round-wound, so be sure that the wires you choose are compatible with the type of speaker they will be connecting to.
Final words for Car Subwoofer Wiring Kit:
Whether you’ve never sewn before or are an experienced seamstress, this car subwoofer wiring kit is a must-have for your project. It comes with all the essentials (wire stripper, wire cutter) and will save you time by doing all of the hard work for you. If it sounds like something that would help with your next DIY project, be sure to check out our other listings on Etsy!